ASAP’s electronic check (or e-check) payment option allows your customers to make online payments using their bank account information.
*** PLEASE NOTE: you must have ACH / Electronic Check enabled on your merchant account before you can turn it on in ASAP and use it. Contact your merchant provider via their online portal or customer service line.
BluePay Payment Gateway
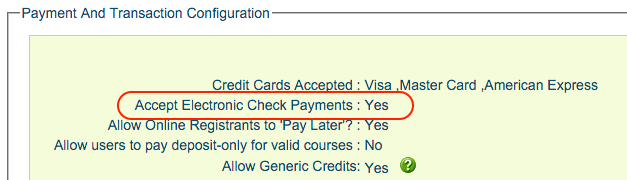
To enable e-checks as a payment option:
- go to your account preferences page (Configure > Preferences)
- click the Edit button at the bottom of the Payments and Transaction Configuration box
- select Yes next to Accept Electronic Check Payments
- click the Save button
Now both students and registrars will see Electronic Check as an payment option when making a payment.
To see the option in the admin tool first click Accept Online Payment on the invoice detail page, then chose Electronic Check from the Select Payment Type menu.
Authorize.Net Payment Gateway
In order to enable e-checks as a payment option, you'll need to first contact your client services manager to have a developer enable this option for you. Once done, they can set this for you in the back end in order for you to start accepting the payment type.
Submitting Payment
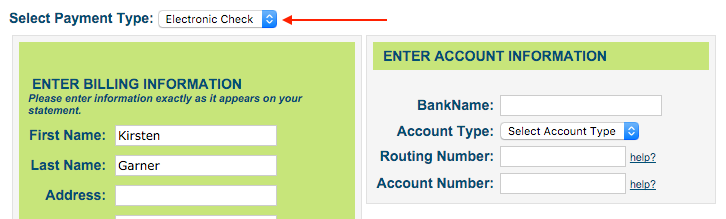
The following information is required when making an e-check payment:
- the name of the customer’s bank
- the account type (business checking, checking, or savings)
- the bank’s routing number
- the customer’s checking number