These are the instructions you will want to use and give to any companies using your public ASAP site for online registration. You will be giving the company primary/administrator all of the details he/she will need to register employees for classes with your organization.
Locating the Company on your ASAP Admin Site
First, you will need to locate and obtain relevant information about the company on your ASAP admin site. From the left nav panel, select 1 Find | Companies, type a portion of the company name in the search box and tap the 2 search button. When you've located the correct company, click 3 view details for the company.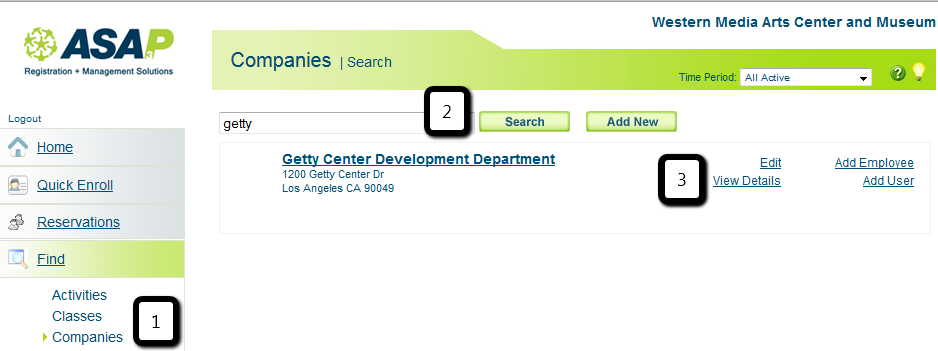
From the Company Details page, you will collect the 4 User Name (email address) and 5 Company ID. This, combined with the password you entered on behalf of the company when you created the company on your ASAP admin site will allow your company to log into your ASAP public site.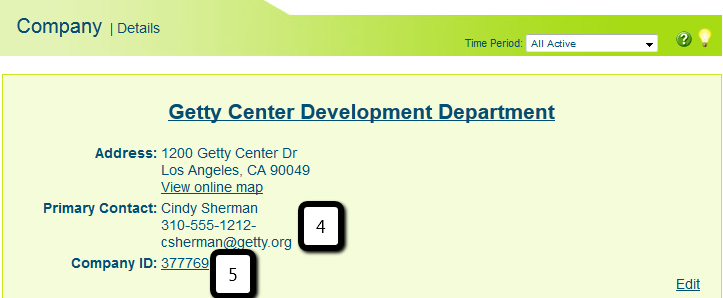
Hand-off Login Information to Company
Give the company the User Name, Company ID (for the company/step 5 above) the 6 following URL: https://register.asapconnected.com/companyLogin.aspx?org=xxx (xxx=your ASAP Company ID). They will then type that 7 information into the fields provided and click 8 Login to proceed.
Once a company is logged into your public ASAP site, the administrator can select 9 which students should be enrolled and click 10 Enroll Selected to begin enrolling these students.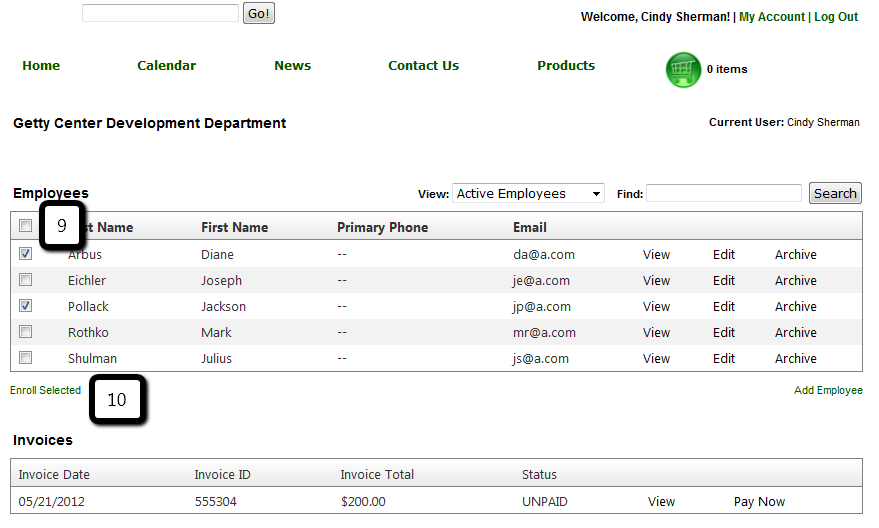
The administrator will see the 11 students currently being registered and will select 12 Class (most common) from the Item Type drop down, use the 13 filters to narrow down to the specific class these students are being registered for and click 14 Enroll students to enroll the selected students in the selected class.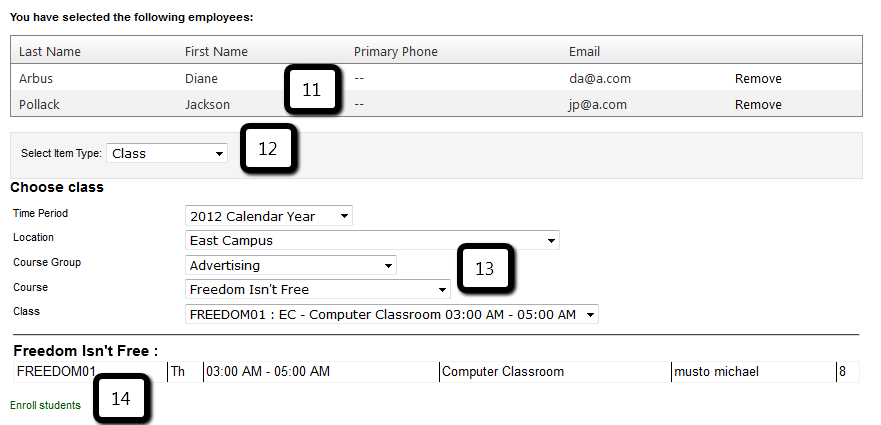
This will 15 show options for the current registration--generating or adding to an existing invoice. The administrator will click 16 Generate Invoice (or add to existing invoice) to proceed.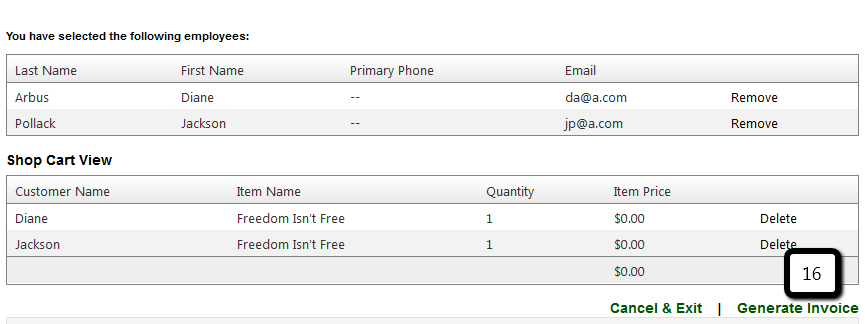
The administrator will be brought back to the main Company page on your public ASAP site. He/she can 17 select more students to register or pay invoices either 18 one at a time or 19 all at once. This example will follow paying all at once.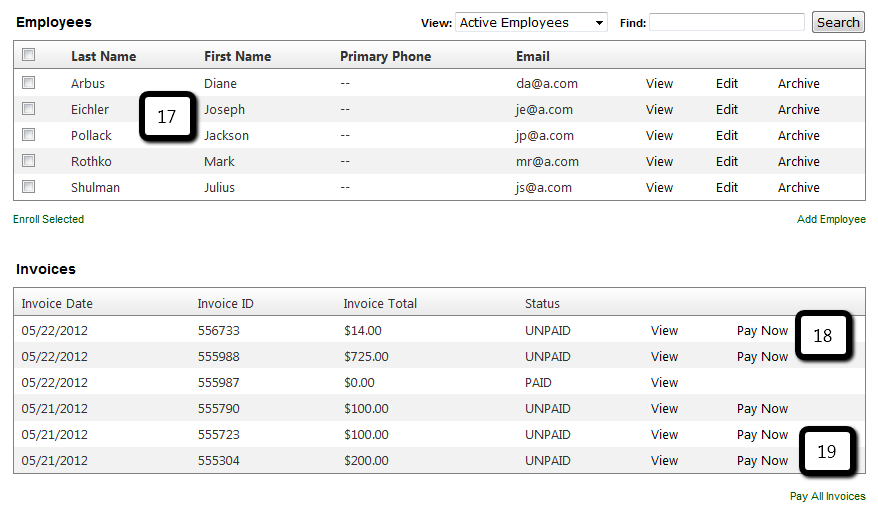
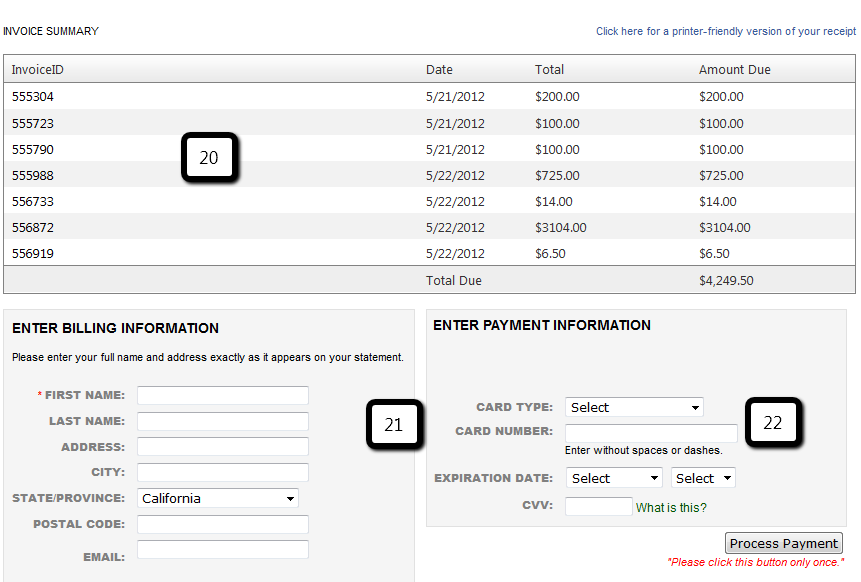
The administrator will be taken to the invoice / payment page (for single payments) or the invoice summary page (for pay all invoices). The administrator will see the 20 item(s) he/she is paying for and will enter 21 payment and 22 billing information.