One of the first things you may have noticed with this new invoice page is that there are less buttons available. With that, some new drop down menus are displayed as well as some new tabs. Let me first start with a blank invoice:
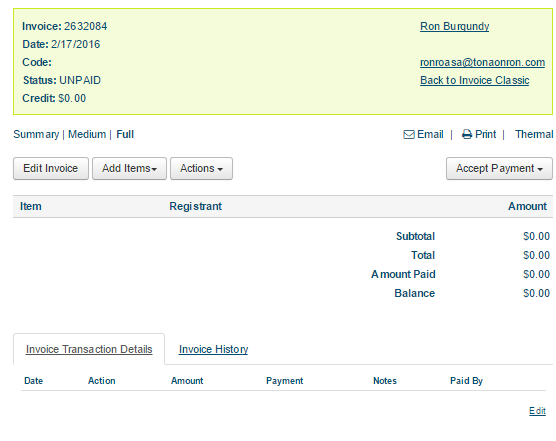
As you can see, all of the buttons below have disappeared. With that, a condensed view is displayed on this page. The information displayed above about the customer is the same but most of what's below the green box has shifted or has been updated. Let's go over each of the new buttons:
Edit Invoice
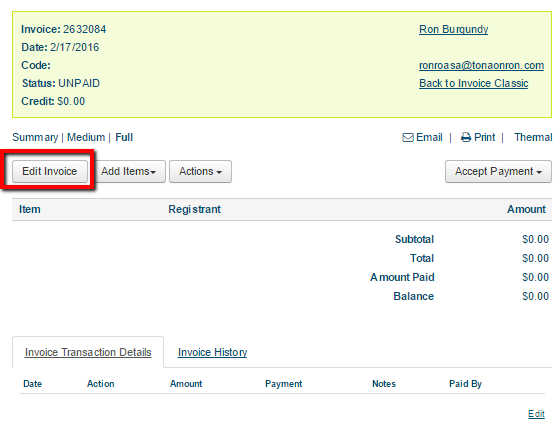
Replacing our old Make Adjustment tool is the Edit Invoice button. No longer will you be taken to a pop up window that brings up more drop downs leaving you guessing what item you are adjusting. Instead, you'll be able to see exactly which fees and what price you would like to set without having to do guess work up or down the price of the item. Check out this link here for more information on this button: Editing Items on the Invoice
Add Items
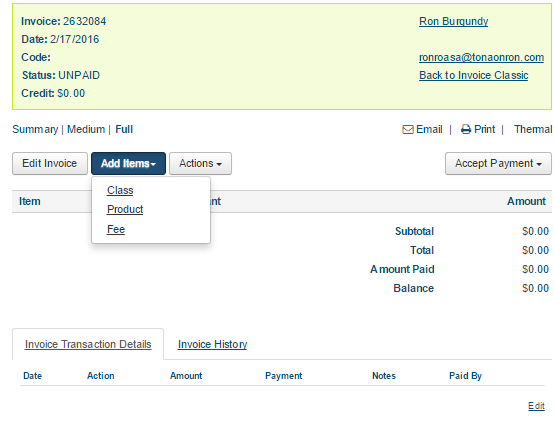
New to this section is the ability to "Add Items" to the invoice. This is replacing "Add more items to this invoice" button. With this, you'll have the ability the add any classes, products, or manual fees. (other option may be available depending on the modules you have turned on) This is a quick solution to adding any additional items to this invoice. Another new feature with this button is that it also allows you to add more items to PARTIAL and PAID invoices as well. No more having to change the status before a new item can be added. This helps to process invoices quicker without having to cycle through the preferred status before making an invoice complete.
Actions:
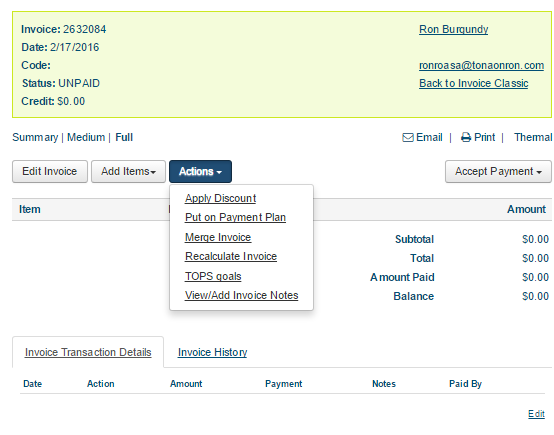
Under this new drop down, we've moved most of the other buttons originally found below the invoice into here. Essentially, any time an action needs to be taken on the overall invoice itself, this is the place to find it. You'll see as the status changes and items are added to the invoice that this list will also expand.
Accept Payment
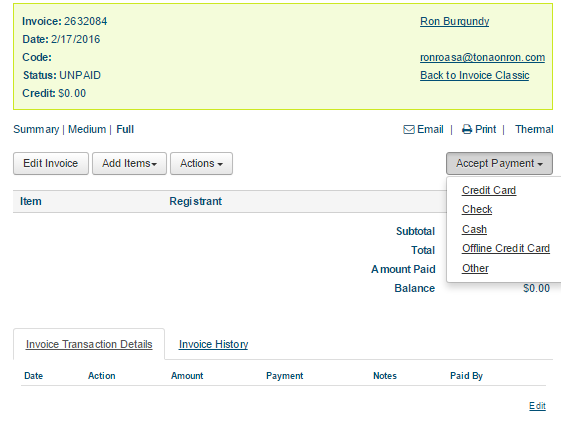
No longer will you have to go through many different dialogue boxes in order to figure out which payment to process on the invoice. From here, selecting this drop down will give you a list of all the payment options found within your organization. Selecting all non-credit card options will bring up a pop up window to input the information in while selecting credit card will open up the familiar payment processing page.
Other Display Changes
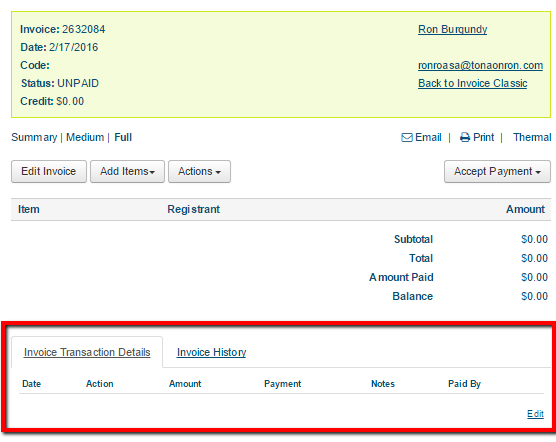
One thing you'll notice is that the section below the invoice has some new tabs. Instead of just the Invoice Transaction Details, you'll also have the ability to see the Invoice History.
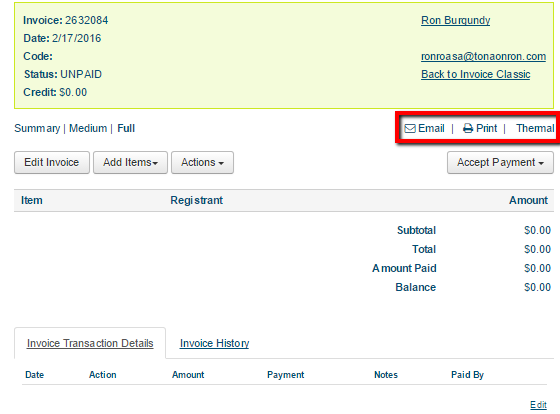
Another new option are these icons that allow you email, page print, or print on a receipt the invoice that's displayed. A cleaner design that's straight to the point instead of having to read through more text.
We'll go into detail each new display feature in different parts. Check out each of them here: