The first step in creating a conference to configure a course group and create the courses (but not the classes) that will be included in the conference. This process is very similar to configuring a course group before creating courses and classes. Conferences are like a collection of classes during a specific time frame.
From the left nav panel, select 1 Configure | Course Groups. Click 2 Add New. Continue to 3 configure the course group. Deselect 4 Show Online. This means that the courses that you will create will be available to you in the system to use in creating the conference, but it won't show up on the left nav panel on your live/public site. Students won't be able to register for the individual offerings within the course group without registering for the conference.

Create a course for each of the sessions you will be offering at the conference. Place these courses in the course group that you just configured.
Now that you have configured your course group and have created your courses, you are ready to create the conference. From the left nav panel, select 5 Create | Conference. Type a 6 Title for your conference (don't populate from an existing course). Type a 7 Description for the conference.
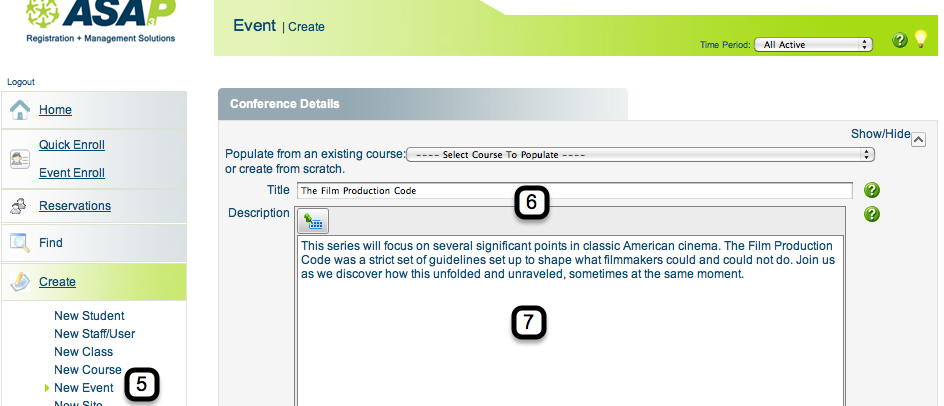
Type any 8 Additional information you want to include for the conference. Type a 9 Code for the conference, type a 10 Capacity for the conference, select 11 Maximum and Minimum ages for students (if desired), type a 12 Deposit Amount if you allow deposits (not common), select 13 whether or not the conference has sessions that customers will register for separately (the choice is typically yes), select 14 whether each day will have new sessions or if the schedule will be based on a single day (multiple day is most common). Click 15 Save Details and Continue.

Select the 16 Time Period the conference will take place in. Select the 17 Day Pattern and the 18 Start and End Dates. Type the 19 Start and End times. If the times each day will vary, select 20 Times Vary and you will be given time slots for each day. When finished, click 21 Save Schedule and Continue.
Type a 22 Name for each slot. Slots are the large tier that you will later place the Courses into. Registrants will be able to choose one course from each slot. The slots will typically have a very general description (as seen below). Enter 23 Slot Times. If the session is required, tick 24 Required and click Save for each slot (whether the slots are required or not). Repeat as often as you need to. When finished, click 25 Save Session and Continue.

Add a 26 Fee for the conference if the conference will have a fee. You can also add fees to the courses that you created for the conference. When finished creating fees, click 27 Save Fees and Continue. 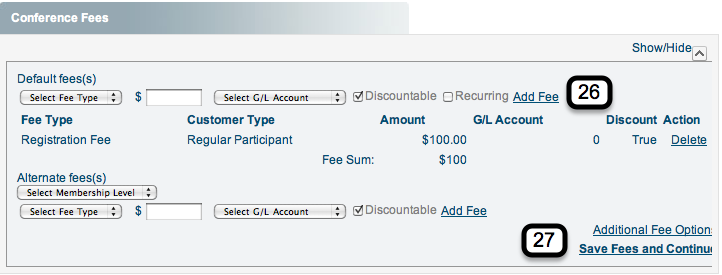
Select a 28 Primary Instructor and a Site and Room for the conference. You will be able to assign instructors and rooms to each session as well. When finished, click 29 Save.
You will be brought to the Conference Detail page. Select 30 View Full Session Schedule. 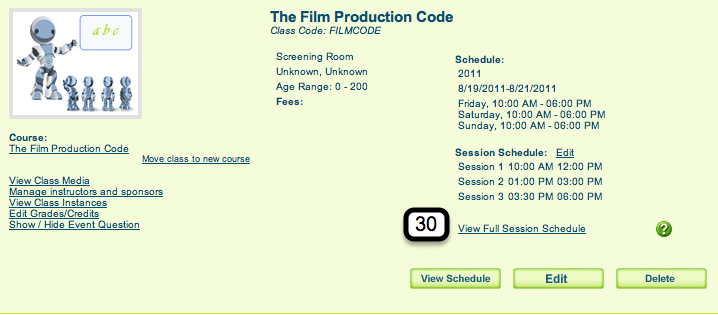
Select the 31 Day of the conference you are creating the schedule for. Click 32 Add New Session for the slot you are working on.
Select the 33 Course Group and 34 Course that you are using for the session you are working on. Select an 35 Instructor, type a Capacity and a Class Code. Select a 36 location/site and facility/room for the session and click 37 Save. Repeat for as many days and sessions that you want to add to the conference. Registrants will be able to choose one item/course from each time slot in the conference. If the time slot is required, then they will have to choose an item from that slot.