*** THIS IS BEST DONE BEFORE YOU HAVE ASA IMPORT DATA FROM VERSION 2. YOU MUST HAVE A MAIN CLIENT DATED 03/16/2016 OR AFTER TO PROCEED. DOWNLOAD THE LATEST SCRIPT & MAIN CLIENT FROM WWW.ASACENTRAL.COM
If you are going to import data into ASAP, including Version 2 Student Types, Version 2 Departments (HSD requirements) and Version 2 Courses or you want to import transcript records from a 3rd party SIS like the local K-12 school district, you must use our data matching tools to help ASAP understand how to read the data files you import.
Here are the steps to help ASAP read the files.
- Export files from ASAP Version 2
- Import those files one by one into ASAP Version 3
- For each record in the imported file from Version 2, match this record to the corresponding Version 3 record and click Save
Step 1
Export files from ASAP Version 2
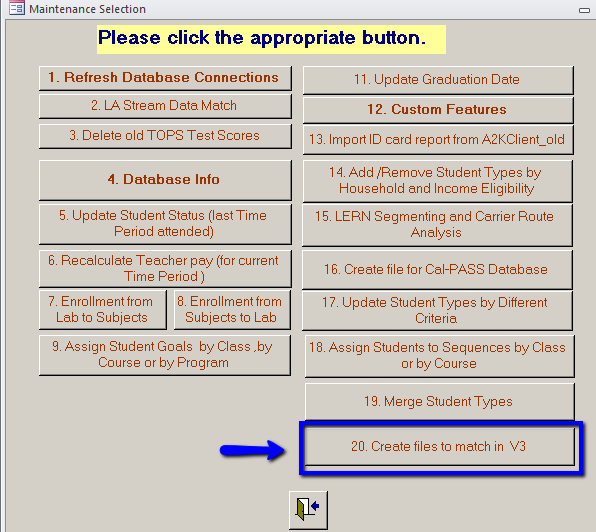
- In Version 2, click Setup | Time Periods | Maintenance and click button #20 to export files to Version 3.
- Choose which file to export (Departments, Student Types or Courses)
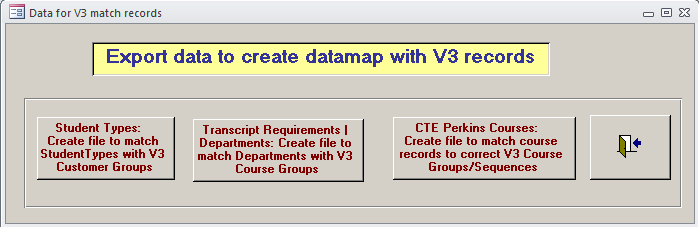
- Courses: please note --> only courses where Course Overview | "Move to V3" is checked will be in the export file. Be sure to review this list before creating Excel file.
- The Excel file will be created. Save to a destination on your computer.
Step 2
Import Version 2 files to Version 3
- Log into Version 3 and click this link: Data Match Page
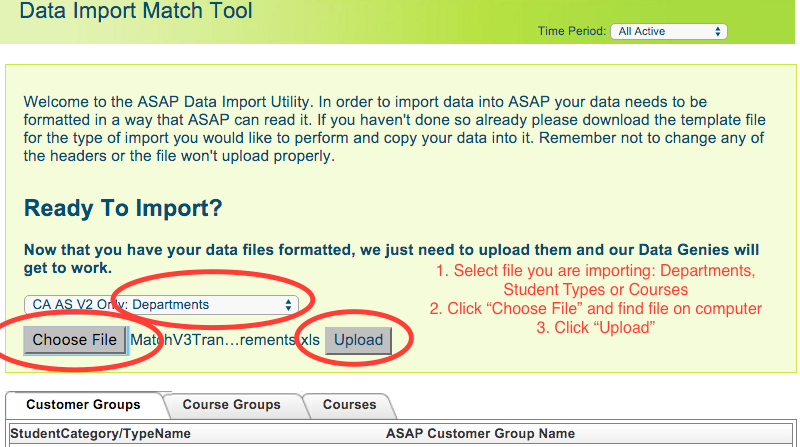
- In the dropdown, pick which file you are importing.
- Click "Choose File". Navigate to where you saved the file from Version 2
- Click "Upload".
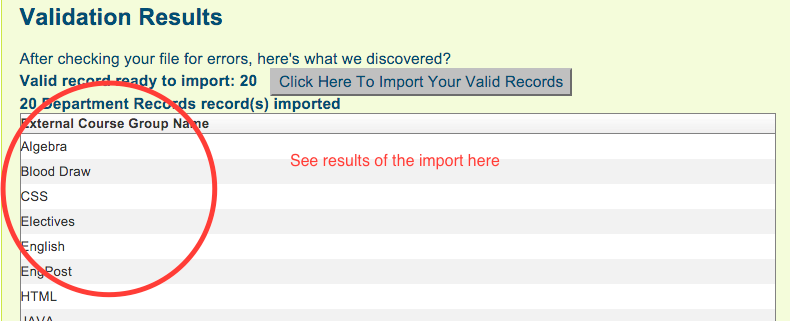
- See the message denoting how many records were found.
- If the number is accurate, click button "Click Here to Import Your Valid Records"

- See the results of the import below
Step 3
Match the Version 2 records to Version 3
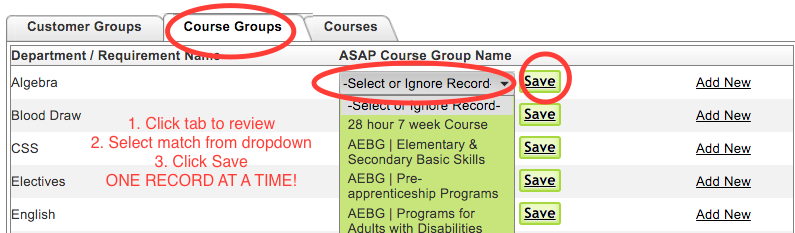
- Click on the tab that is the type of file you imported
- Customer Groups = Student Types
- Course Groups = Departments
- Courses = Courses
- For each record, one record at a time, select the appropriate matching record from the dropdown
- Click Save
- Move to the next record
IMPORTANT NOTES
- If the record should be IGNORED, choose the option "Select or Ignore Record", which is the first option in the dropdown, and click Save
- If the correct match is NOT in the dropdown, click "Add New" to add the option and then select it and click Save.
**WHEN YOU ARE FINISHED WITH THE MATCHING, NOTIFY Cindy OR Kevin WHO WILL FINALIZE THE DATA IMPORT**