During the cancellation process, you choose whether you want to cancel a specific class instance, or the entire class. You can also choose to drop enrolled and pending registrants, or leave them as is. If you want to give credit or issue refunds, you'll need to go to each registrant's invoice and take the appropriate action.
- Locate your class.
- Click the class to open the class details page.
- On the class details page menu, click More options
 , and select Cancel this class.
 - On the Cancel this Class page, select whether you want to cancel the entire class or one specific class.
- If you are cancelling one class, select the class from the list.
- Select whether you want to email students and if so, in the text box, type the email message.
- Click Complete Cancellation.
- On the Drop Student dialog box, select how you want to handle the enrolled registrants. You can cancel the class and drop all the students, or just cancel the class and leave students enrolled.
- Click Return to details.
- If credits or refunds are due, access the invoice for each registrant and take the applicable actions.
The cancelled class remains on your class listings page. When you open the class details page, there is a red dot next to the name indicating the class is cancelled.
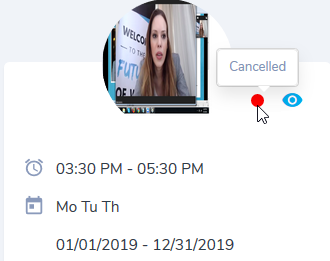
If the class is displayed on your public site, it will remain there, but the status displays Cancelled next to the class.
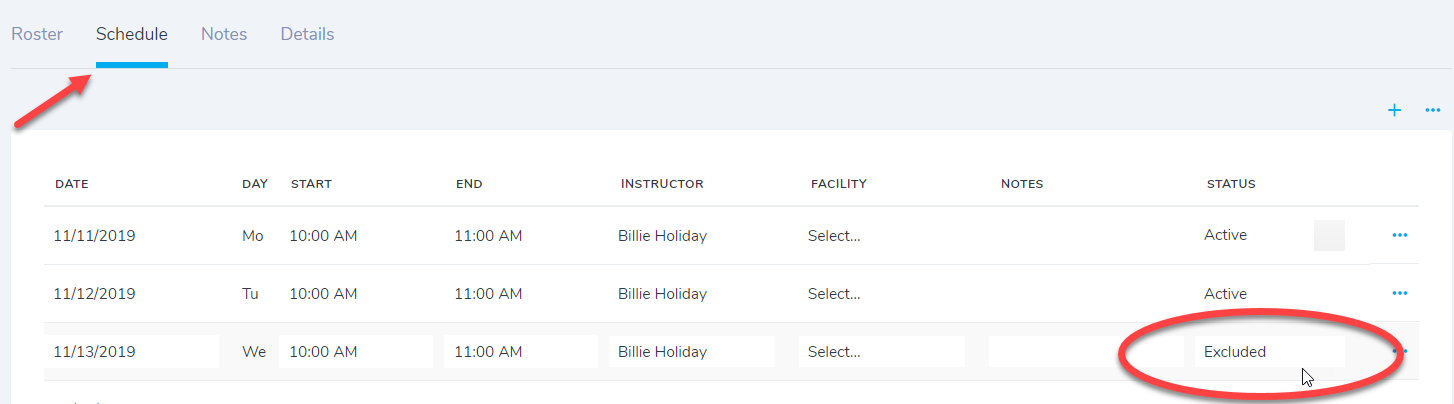
If you cancelled one class instance, on the Schedule tab of the class details page, the cancelled class shows Excluded in the Status column.