Often times during class creation you do not know the schedule, so you leave it as TBD. This article walks you through setting up a class schedule after the class is created.
- Locate your class.
TIP: Use the search feature in the ASAP ribbon to quickly locate your class. Select Classes from the list and then type the class name. You can type the first few letters of the class and ASAP displays a list of all active classes matching your criteria. ![]()
- Click the class to open the class details page.
- On the class details page, click the Details tab and then the Schedule tab.
- Click the edit pencil
 .
. - For Schedule is TBD, click On.
NOTE: In the Dates fields you see the start and end dates of the time period selected for the class. Your class dates need to be within this range.
- For the start date, click the calendar and select the first day of class.
- For the end date, click the calendar and select the last day of class.
Notice for Days, ASAP highlights the start and end days for the dates you selected. 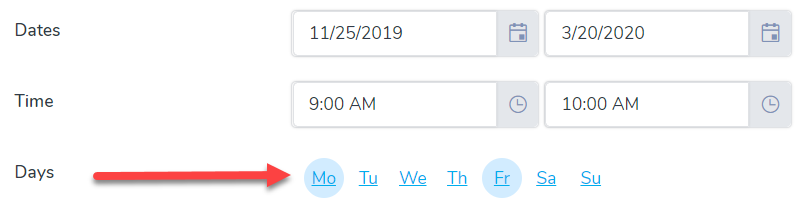
- For Days, if your class is held on additional days of the week beyond what is selected, click the applicable days.
- For Time, enter the class start and end time. You can type the time, or click the clock to select the start and end time. If you use the clock, be sure to click Set after selecting the start and end time.
- If the start times will vary on the different days, click Start Times Vary and set the times.
- For Every, select the frequency the classes are held.
- If you are building in time for a break, click Add Break and enter break times.
- If the class is an overnight class, set Overnight Class to On.
- Click
 .
.
To view the class schedule, On the class details page, click the Schedule tab.