Programs and Course Groups are used to organize courses. To learn about ASAP's hierarchy, check out this article: Class Hierarchy - Programs, Course Groups, Courses and Classes.
What do you want to do?
- Create a Program
- Create a Course Group
- Add Course Groups to a Program
- Add Courses to a Course Group
- Remove Courses from a Course Group
- Edit a Course Group
- Delete a Course Group
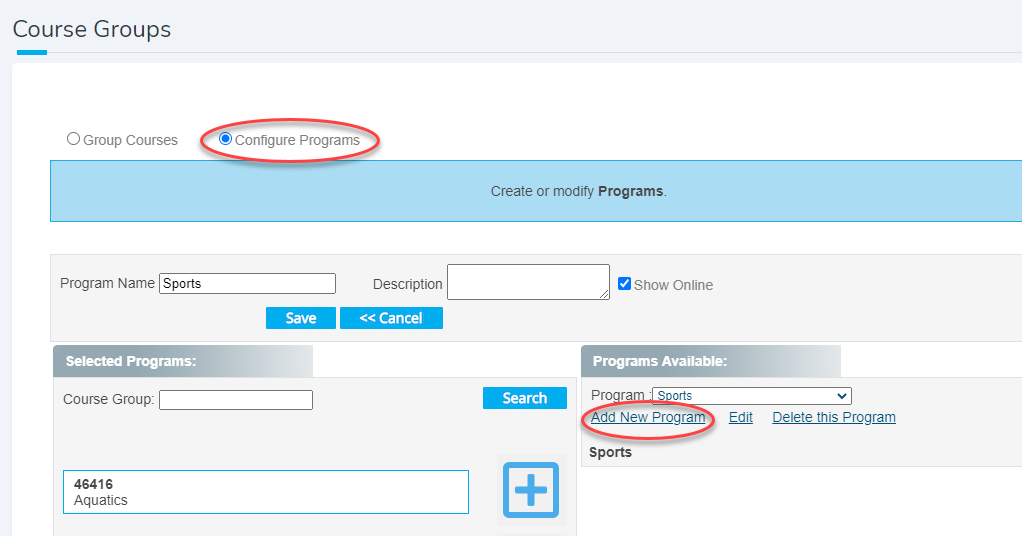
Create a Program
- On the Navigation menu, click Set Up, and then click Configure Programs.
- On the Programs page, select Add New Program
- Enter the name of your program, a description (this does NOT appear online)
- If you wish this program to appear in the left nav menu of your website, click the Show Online box
- Click Save
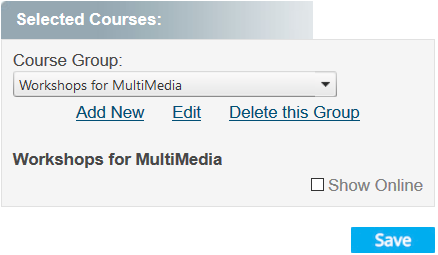
Create a Course Group
- On the Navigation menu, click Set Up, and then click Course Groups.
- On the Course Groups page, in the Selected Courses column, click Add New.

- Provide a Group Name.
- If you want to add an image, next to Image, click Upload, locate the image, and then click Upload.
- For Description, enter a description about the course group.
- If you want to apply prerequisites to this course group, click Manage Prerequisites and select the prerequisites.
- Click Save. (in the light gray box)

- If you are ready to display this course group on your Public portal, select Show online.
- When finished, click Save.

TIP: You may not want to select Show Online until all your classes are created and are configured to display online. You can always come back and select it later.
Add Course Groups to a Program
- On the Navigation menu, click Set Up, and then click Configure Programs.
- On the Programs page, select your Program.
- In the Course Group column, locate your Course Group, and click
 to add it to the Program.
 - Repeat this step for all Course Groups you want to add to your Program
- Click Save.
Add courses to a course group
- On the Navigation menu, click Set Up, and then click Course Groups.
- On the Course Groups page, in the Selected Courses column, select your Course Group.
- In the Courses Available column, locate your course, and next to the course, click .

ASAP moves the course to the Selected Courses column.
- Continue adding as many courses to the course group as you want.
NOTE: You can add a course to multiple course groups.
- When finished adding courses, click Save.
Remove Courses from a Course Group or Course Groups from a Program
- On the Navigation menu, click Set Up, and then click Course Groups or Cnfigure Programs
- On the Course Groups/Programs page, in the Selected Courses column, select your Course Group/Program.
- Find the course or course group you want to remove, and click the wastebin basket.

- Confirm your choice by clicking Delete.
- If there are other courses to delete, repeat the previous steps.
- When finished, click Save.
Edit a course group
- On the Navigation menu, click Set Up, and then click Course Groups.
- On the Course Groups page, in the Selected Courses column, select the Course Group, and then click Edit.
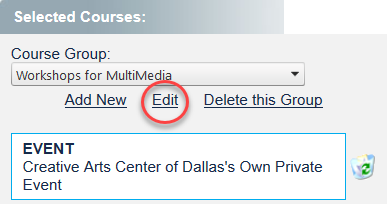
- Make your edits and then click Save.
Delete a course group
- On the Navigation menu, click Set Up, and then click Course Groups.
- On the Course Groups page, in the Selected Courses column, select the Course Group, and then click Delete this Group.
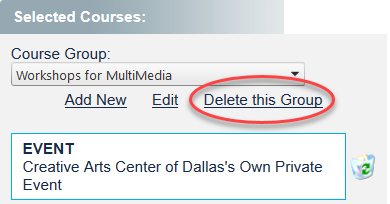
- Confirm your choice by clicking OK.