This comprehensive video covers all elements of Credit Programs and how you can set them up to manage groups of classes and output to Transcript records.
5m 32s
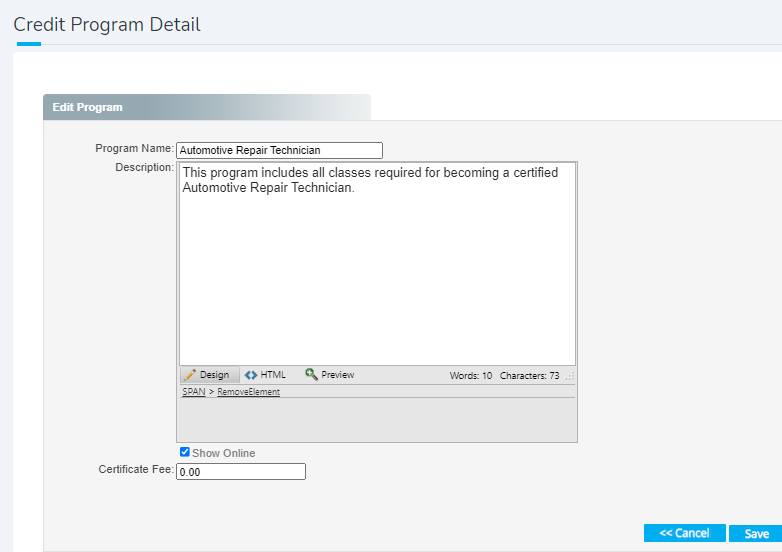
Step 1 - Create a Credit Program
Go to Credit Programs on the left navigation menu. Click on the  icon.
icon.
Step 2 - Fill out the fields
Program Name - What is your credit program called?
Description - Put in details of the credit program.
Show Online - Check this box if it needs to be visible on the Student Portal.
Certificate Fee - Enter a fee amount if there is one for your certificate.
Click Save.
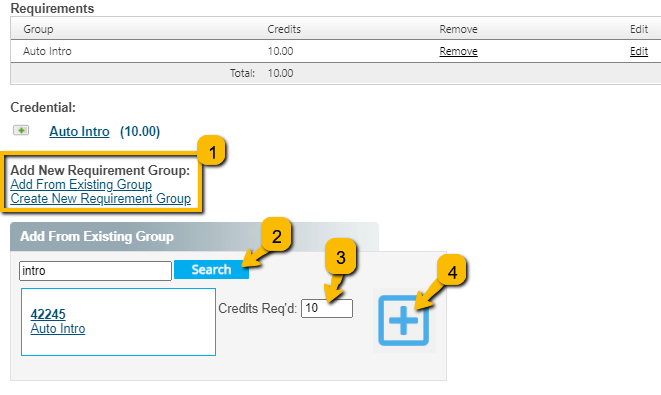
Step 3 - Add the required course groups for your credit program
Click Add From Existing Group or Create New Requirement Group. Select the course group and enter the # of credits required to complete that group.
You can add multiple course groups and enter required credit amounts needed for each one.
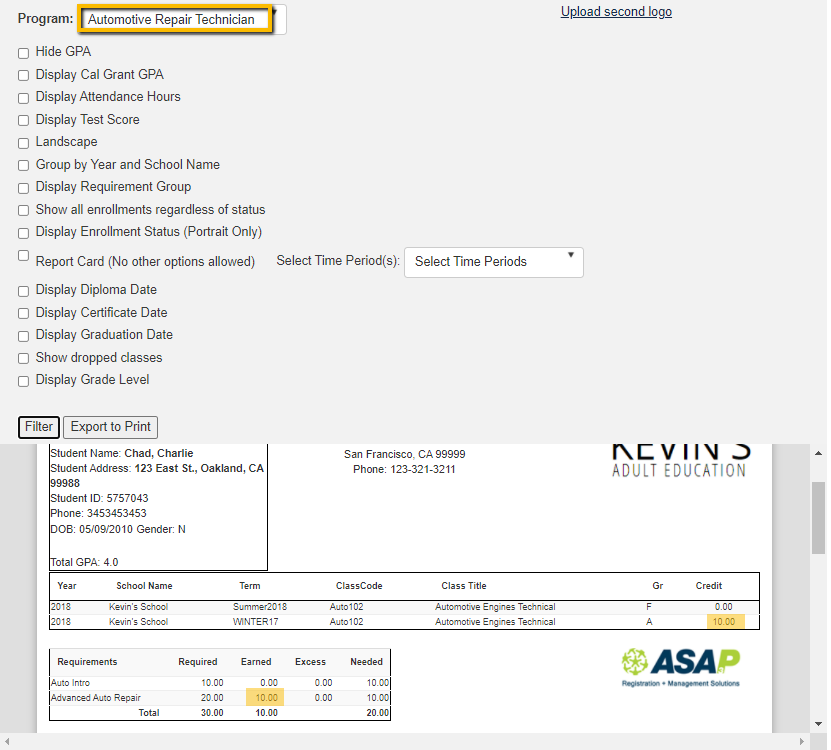
Once you're finished, you'll be able to go to a Student, and look at their transcript records while focusing on just classes they've taken under the credit program you've created.
On a student detail page, go to
tab Educations Record
tab Transcripts
click on the  icon
icon
select Transcript Report