Before creating private lessons, the account must have fee tiers. A fee tier is a type of fee that allows you to charge a different fee for different lessons -- for example, a 30 minute lesson on Private Lessons (Fee Tier 1) can be X dollars, whereas a 30 minute lesson on Suzuki (Fee Tier 2) can be Y dollars. Overall, the fee tier system allows you to create as many different types of charges to your clients as you see fit. To set up fee tiers, follow these steps:
1. Create Fee Tiers
1) Go to Configure in the left navigation
2) Click on Setup Data
3) You will be brought to the Setup Data page (app.asapconnected.com/setupData.aspx). Scroll to the bottom to “Fee Tiers.” Add as many Fee Tiers as you like. If you don’t know what you would like to add, try to add two or three so you have options for later. You can call them “Tier Level 1,” “Tier Level 2” and “Tier Level 3” for now.
4) Give the Fee Tiers codes. They can be whatever you like. Make them easy to remember.
5) Click “Save” when finished.
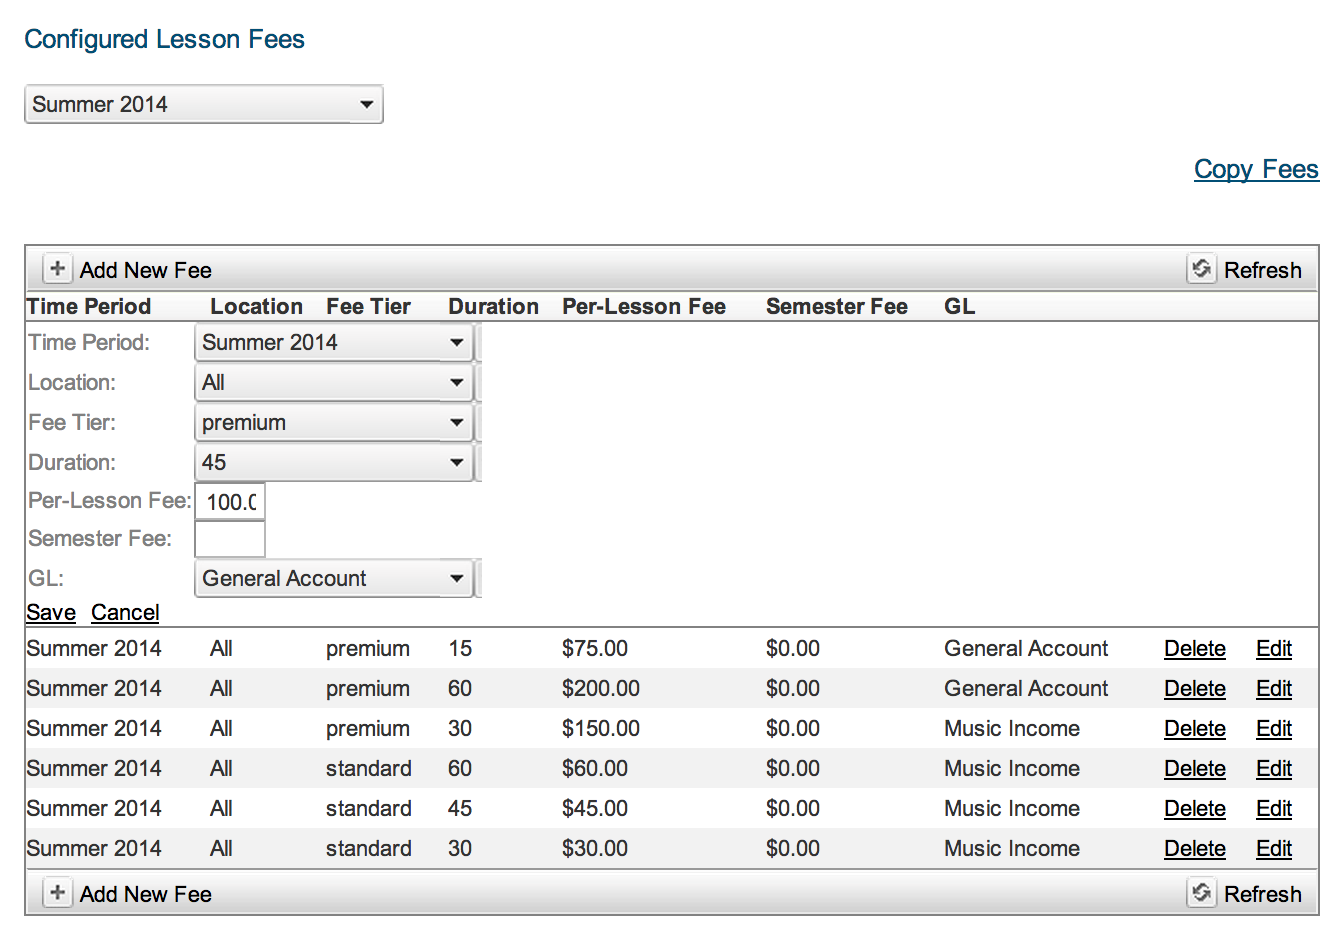
2. Configure Fee Tiers
You will now associate information with the fee tiers you created. This way, when they are later selected, they automatically have all fee information configured. Follow the steps below:
1) Go to Private Lessons in the left navigation.
2) Click on “Fee Tiers.”
3) This will bring you to the Fee Tiers page for private lessons (app.asapconnected.com/PLFees.aspx). Here, you will assign values to the fee tiers.Be sure to already have Time Periods, Locations and G/L Codes saved to the system. If you do not, create them before continuing.
4) Check Time Period drop-down at top and ensure that it is on the correct selection.
5) Click on “Add New Fee.” You will now need to include all the information associated with that fee tier. To do this, you will select Time Period and Location for lesson. You will then select the fee tier and, after that, the duration of the lesson for that tier (e.g. a 30 minute lesson is X amount of dollars). Finally, you will choose per lesson fee. You will then select the G/L Code.
6) Press “Save” when complete.