When entering instructor availability in ASAP you will first need to create a date range for that availability in Tools>Instructor Availability.
A custom date range can be based off of your school’s time period dates, for example, if your Spring Semester runs from January 1st through May 1st, you can create a custom date range named "Spring Semester" using the same dates configured for your time period start and end dates.
For example, if you are entering availability for your instructors for your spring semester which runs from January 1st to May 1st, you should create a date range called "Spring Semester" and set the start and end dates to be the same as the start and end dates of your spring semester time period.
If desired, you could also create a date range that lasts the whole year if your instructor's availability does not change from semester to semester, whatever makes the most sense for your school.
Once you've determined the dates you would like to use, follow these steps to create the new date range:
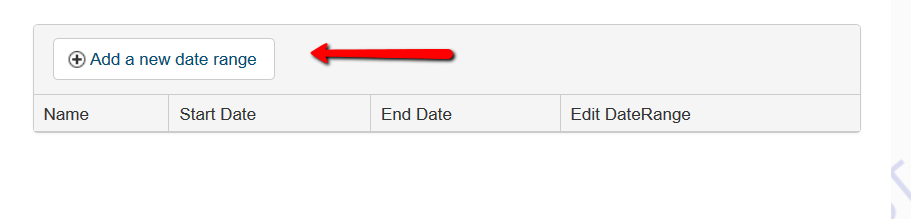
1. Go to Tools>Instructor Availability.
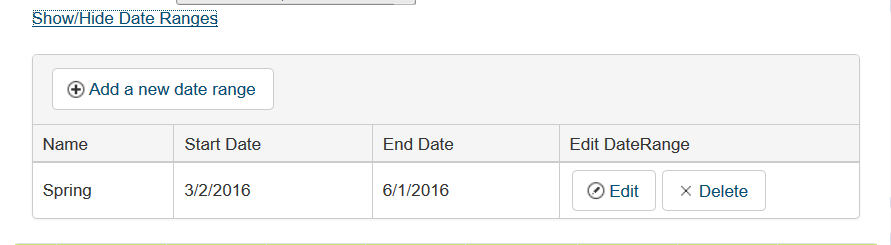
2. Click on the "Show/Hide Date Ranges" link

3. Click "+ Add a new date range" button
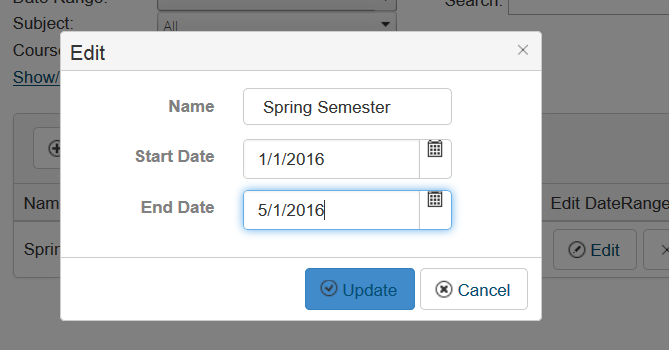
3. Enter a name, and start and end date for the date range in pop up and click "Update" button
4. The new date range will now be listed in the Date Range drop down menu and availability will be ready to be entered.
5. To view the newly created date range to edit or remove, just click the "Show/Hide Date Ranges" link
Important:
In order to have access to creating and editing custom date ranges you will need to have the user access "Allow Instructor Availability" enabled under Configure>User Access